ログイン画面の作成
- 解説
- 1. デフォルトのログイン画面
- 2. オリジナルのログイン画面
- 3. Controllerの作成
- 4. ログイン認証設定
- 5. cssの適用
- 6. ソース管理
解説
1. デフォルトのログイン画面
プロジェクトの実行方法
それではつぶやきアプリを作成していきます。まずは動作確認として、プロジェクトを実行してみましょう。
手順1
| (1) | VSCodeのエクスプローラーから「src > main > java > net > digskill > tweet_spring」フォルダー内の、「TweetSpringApplication.java」を開いてください。 |
| (2) | 右上に表示されている「実行(▷のアイコン)」をクリックして、「Run Java」をクリックしてプロジェクトを実行してください。 |

VSCodeの「ターミナル」に以下のメッセージが出力されていれば実行成功です。

また、プロジェクトを実行すると、エディタ上部にデバッグツールバーが表示されます。ここではプロジェクトの再起動や、停止を行えるので活用しましょう。

VSCodeの左下に表示されている「SPRING BOOT DASHBOARD」の、プロジェクト名の行にカーソルを合わせると表示される「Start」(▷のアイコン)をクリックすることでもプロジェクトを実行することができます。

ブラウザで表示
つぶやきアプリを起動できたのでブラウザから確認してみます。「ターミナル」の、「Tomcat started on port(s)」の行に表示されているポート番号(通常は8080)を確認し、ブラウザのアドレスバーに「localhost:確認したポート番号」を入力してください。アクセスすると下の画像のようなページが表示されます。
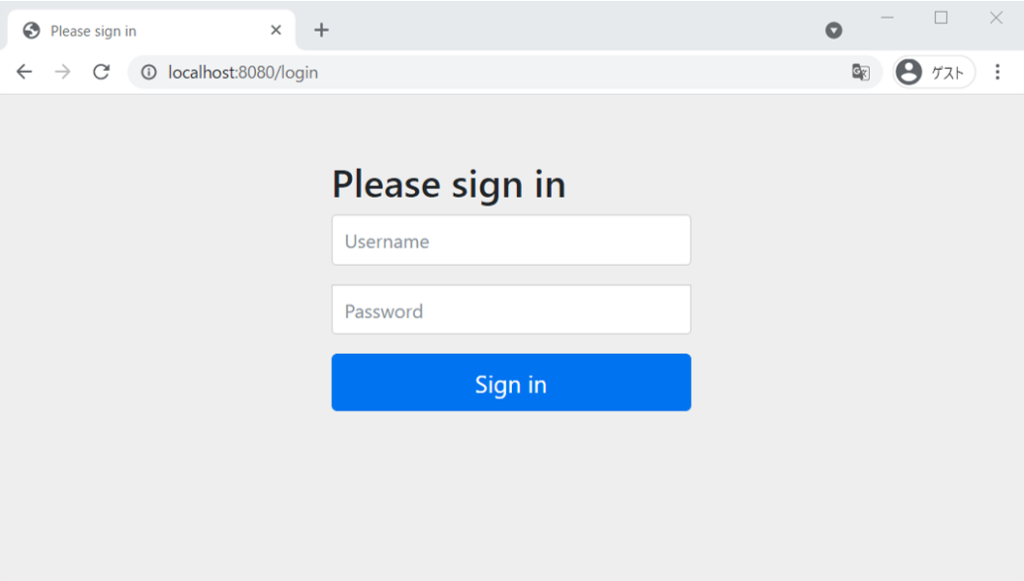
※確認したポート番号が「8080」以外だった場合は、以降のページで適宜読み替えて進めてください。
デフォルトのログイン画面
プロジェクト作成後、新規にファイルを作成することもなく、コードも記述していないのに、プロジェクトを実行しただけでログイン画面が表示されました。これはプロジェクト作成時に依存関係に追加したSpring Securityのおかげです。
他にも、特に設定を変更していない場合、デフォルトで下記のUsername、Passwordでログインすることができます。
デフォルトのUsername・Password
| Username | user |
| Pssword | ターミナルに表示されている「Using generated security password」の文字列 |

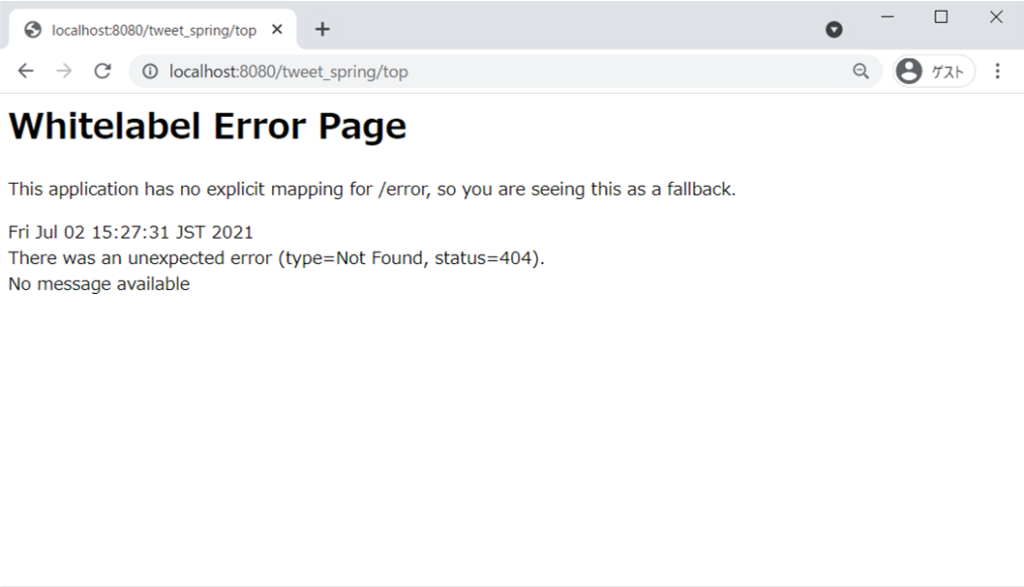
※まだ遷移先を作成していないため、ログイン成功時は404エラー画面が表示されます。
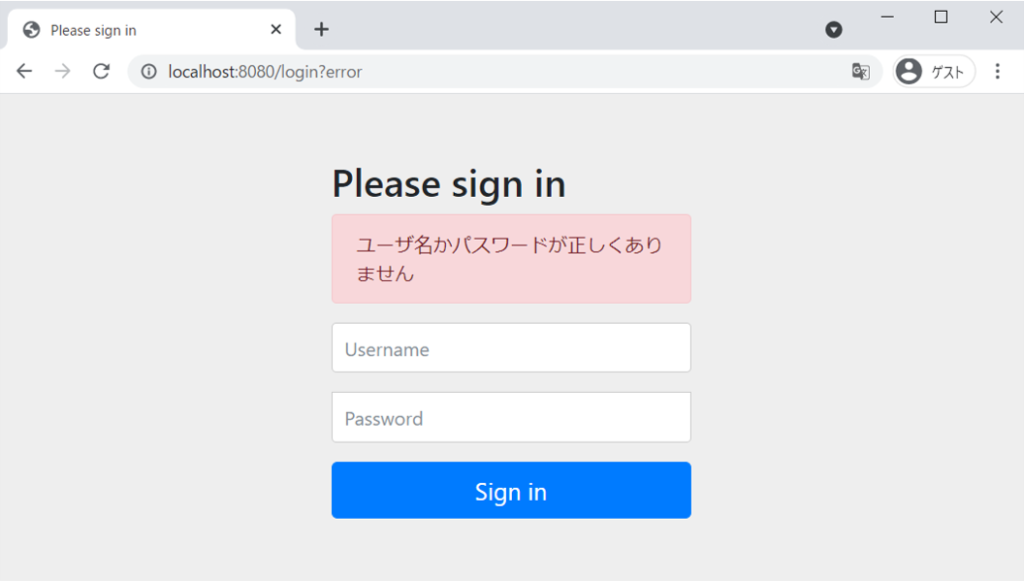
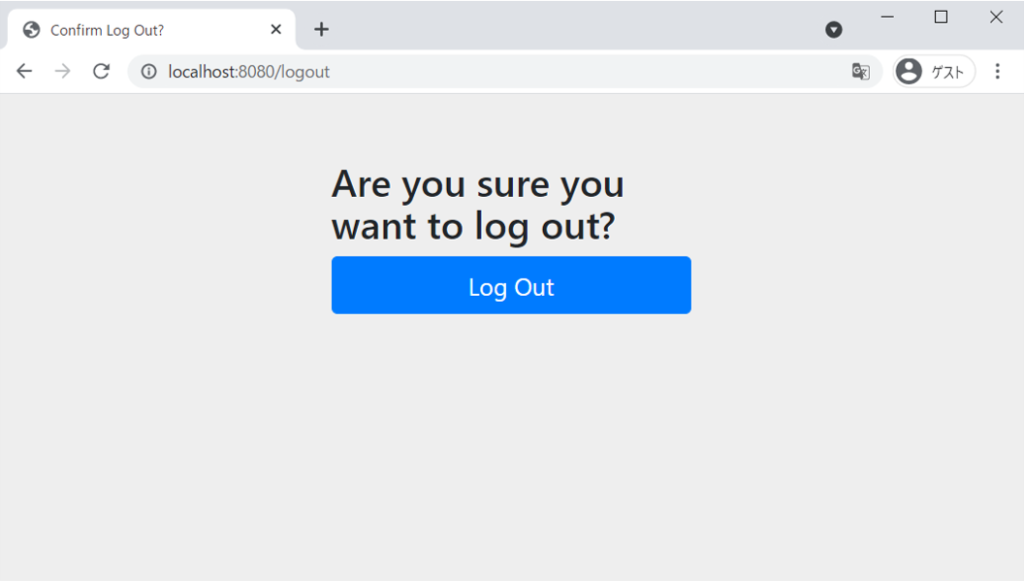
また、ログインを失敗するとエラー画面、「localhost:8080/logout」にアクセスするとログアウト画面が用意されているので試してみましょう。
デフォルトログインエラー画面
デフォルトログアウト画面
2. オリジナルのログイン画面
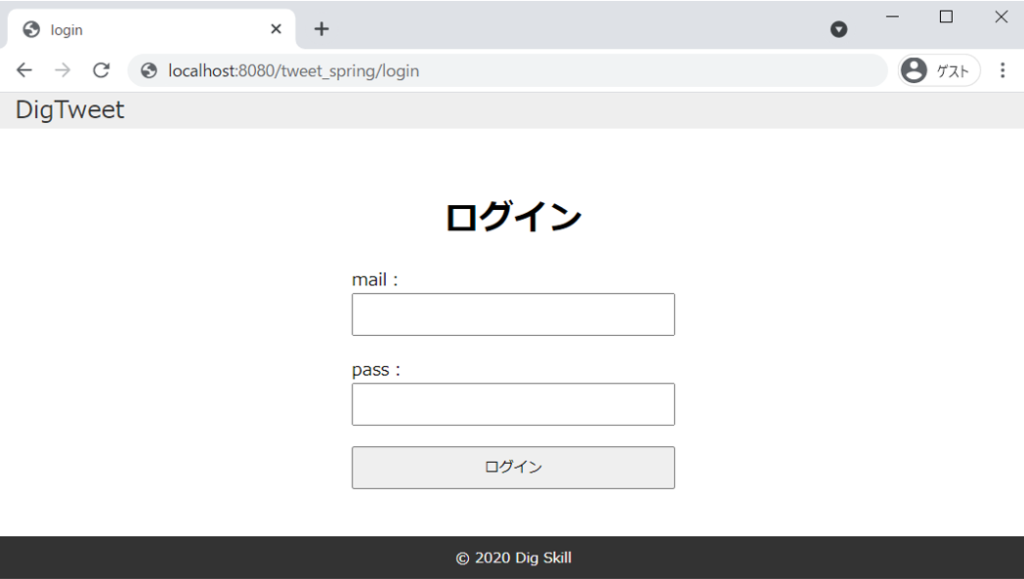
ログイン画面の最低限のデザインや機能はSpring Securityのおかげで実装が済んでいます。しかし、このままでは仕様とかけ離れているため、これらを仕様に沿うようにカスタマイズしていきます。まずは独自のログイン画面を作成しましょう。
手順2
| (1) | 「src > main > resources > templates」フォルダー内に「auth」フォルダーを作成し、その中に「login.html」ファイルを作成してください。 |
| (2) | 作成した「login.html」を下記のコードで置き換えてください。 |
<!DOCTYPE html>
<html xmlns:th="http://www.thymeleaf.org" xmlns:layout="http://www.ultraq.net.nz/thymeleaf/layout">
<head>
<title>login</title>
<link rel="stylesheet" th:href="@{/css/style.css}">
</head>
<body>
<header>
<div class="container">
<div class="flex_parent">
<div class="logo">
<a th:href="@{/top}">DigTweet
</a>
</div>
</div>
</div>
</header>
<div class="section_inner">
<div class="container">
<h1>ログイン</h1>
<form class="login_form" th:action="@{/login}" method="POST">
<label for="username">mail:</label>
<input id="username" type="text" name="username">
<label for="password">pass:</label>
<input id="password" type="password" name="password">
<button type="submit">ログイン</button>
</form>
</div>
</div>
<footer class="flex_parent">
<p><small>© 2020 Dig Skill</small></p>
</footer>
</body>
</html>3. Controllerの作成
次は作成したhtmlファイルとURLをマッピングするために、Controllerを作成します。
手順3
| (1) | 「net.digskill.tweet_spring.controller」パッケージを作成し、その中に「AuthController.java」ファイルを作成してください。 ※「src > main > java > net > digskill > tweet_spring」フォルダーの中に「controller」フォルダーを作成することでパッケージを作成できます。 |
| (2) | 作成した「AuthController.java」を下記のコードで置き換えてください。 |
package net.digskill.tweet_spring.controller;

import org.springframework.stereotype.Controller;
import org.springframework.web.bind.annotation.GetMapping;

@Controller
public class AuthController {

    @GetMapping("/login")
    public String login() {
        return "auth/login";
    }
}
4. ログイン認証設定
次は、Spring Securityによるログイン認証の設定を編集します。
手順4
| (1) | 「net.digskill.tweet_spring.config」パッケージを作成し、その中に「WebSecurityConfig.java」ファイルを作成してください。 |
| (2) | 作成した「WebSecurityConfig.java」を下記のコードで置き換えてください。 |
package net.digskill.tweet_spring.config;

import org.springframework.context.annotation.Bean;
import org.springframework.context.annotation.Configuration;
import org.springframework.security.config.annotation.web.builders.HttpSecurity;
import org.springframework.security.config.annotation.web.configuration.EnableWebSecurity;
import org.springframework.security.web.SecurityFilterChain;

@Configuration
@EnableWebSecurity
public class WebSecurityConfig {

    @Bean
    SecurityFilterChain securityFilterChain(HttpSecurity http) throws Exception {
        http.formLogin(login -> login
                .loginPage("/login")
                .defaultSuccessUrl("/top", true)
            );
        return http.build();
    }
}| (3) | VSCodeの「エクスプローラー」から「application.properties」ファイルを右クリックして「名前の変更」を選択し、「application.yml」に拡張子を変更してください。 |
| (4) | 「application.yml」を、下記のコードで置き換えてください。 |
server:
    servlet:
        context-path: /tweet_spring
application.yml
Spring Bootではアプリケーションに関する各種設定は「application.properties」、もしくは「application.yml」に定義します。この「yml(ヤムル)」というファイル形式は、インデント(左側の字下げレベル)が意味を持っていますので注意しましょう。
ここでは、アプリケーション実行時のURLが、「localhost:8080/tweet_spring/~」となるようにコンテキストパスを設定しています。
5. cssの適用
『Java WEB中級』コースでは、学習の為、途中までCSSを適用させずに開発していましたが、今回は最初からCSSを適用した状態でつぶやきアプリを作成していきましょう。
手順5
| (1) | 「src > main > resources > static」フォルダー内に「css」フォルダーを作成し、その中に「style.css」ファイルを作成してください。 |
| (2) | 作成した「style.css」を下記のコードで置き換えてください。 |
@charset "utf-8";

* {
    box-sizing: border-box;
}

body {
    min-width: 320px;
    /* フッター固定対策 */
    display: flex;
    flex-flow: column;
    min-height: 100vh;
}

body,
textarea {
    font-family: "メイリオ", arial, helvetica, sans-serif;
}

body,
p {
    margin: 0;
}

a {
    text-decoration: none;
}

.section_inner {
    padding: 40px 0;
}

.container {
    max-width: 980px;
    margin: 0 auto;
    padding: 0 1em;
}

.container.width_narrow {
    max-width: 720px;
}

.flex_parent {
    display: flex;
}

.small_text {
    font-size: 0.8em;
}

/* ====== header ====== */

header {
    background-color: #eee;
}

header div.container div.flex_parent {
    justify-content: space-between;
    align-items: center;
}

ul {
    list-style: none;
    padding: 0;
}

header div.container div.flex_parent nav ul li {
    display: inline-block;
    margin-left: 1em;
}

header div.container p {
    text-align: right;
}

header div.container p span.user_name {
    font-weight: bold;
}

header div.container div.flex_parent div.logo a {
    font-size: 1.4em;
    color: #333;
}

/* ====== end/header ====== */

/* ====== footer ====== */

footer {
    background: #333;
    color: #fff;
    margin-top: auto;
    /* フッター固定対策 */
    padding: 0.5em;
    justify-content: center;
    align-items: center;
}

/* ====== end/footer ====== */

div.container>h1 {
    text-align: center;
}

form input,
form textarea {
    box-sizing: border-box;
    width: 100%;
}

form input,
form button {
    height: 3em;
}

form.tweet_form {
    text-align: center;
    margin-bottom: 2em;
}

form.tweet_form input {
    width: 70%;
    max-width: 30em;
}

div.date_break_box {
    text-align: center;
    color: #666;
}

div.tweet_box {
    margin: 2em 0;
}

div.tweet_box.login_user {
    flex-direction: row-reverse;
}

div.tweet_box div.tweet_user_box {
    margin: 0 1em;
    text-align: center;
    font-weight: bold;
    flex: 0 0 90px;
}

div.user_icon {
    background-color: skyblue;
    height: 60px;
    width: 60px;
    justify-content: center;
    align-items: center;
    margin: 0 auto;
    font-size: 1.4em;
    border-radius: 50%;
}

div.tweet_box.login_user div.user_icon {
    background-color: lightsalmon;
}

div.tweet_box div.tweet_text_box {
    border-radius: 8px;
    background-color: #eee;
    padding: 1em;

}

div.tweet_box.login_user div.tweet_text_box {
    background-color: #ddd;
}

div.tweet_box div.tweet_text_box p.tweet_text {
    word-break: break-all;
}

div.tweet_box div.tweet_text_box p.tweet_date {
    margin-top: 0.6em;
    text-align: right;
}

/* ====== auth ====== */

form.login_form input,
form.register_form input,
form.register_form textarea {
    margin-bottom: 1.5em;
}

form.login_form,
form.register_form {
    max-width: 300px;
    margin: 0 auto;
}

form.login_form button,
form.register_form button {
    width: 100%;
}

form.register_form label span {
    font-size: 0.6em;
    color: #c44;
    background-color: #fff;
    border-radius: 4px;
    padding: 0px 6px;
    margin-bottom: 0.5em;
    border: solid #c44 1px;
}

/* ====== end/auth ====== */

/* ====== mypage ====== */

div.profile_box {
    margin-left: auto;
    margin-right: auto;
    margin-bottom: 2em;
    padding: 1em;
    border: dashed #666 2px;
    background-color: #fafafa;
}

div.profile_box div.flex_parent {
    position: relative;
}

div.login_user_box {
    margin-right: 1em;
    font-weight: bold;
}

div.profile_box div.flex_parent button {
    position: absolute;
    top: 0;
    right: 0;
}

div.login_user_info.flex_parent {
    justify-content: center;
    flex-direction: column;
    font-weight: bold;
}

div.tweet_box div.tweet_text_box button {
    height: 2em;
}

div.tweet_box div.tweet_text_box button.edit_button {
    color: royalblue;
}

div.tweet_box div.tweet_text_box form.delete_form {
    display: inline-block;
}

div.tweet_box div.tweet_text_box form.delete_form button {
    color: red;
}

/* ====== end/mypage ====== */

/* ====== edit ====== */

p.edit_tweet_date {
    text-align: center;
}

/* ====== end/edit ====== */以上で遷移先のカスタマイズと、オリジナルのログイン画面を実装することができました。プロジェクトを再起動して「localhost:8080/tweet_spring/login」にアクセスした後、『1. デフォルトのログイン画面』で解説したUsername、Passwordでログインしてみましょう。仕様通りの「localhost:8080/tweet_spring/top」に遷移すれば成功です。
ログイン画面
トップ画面
6. ソース管理
ここで一度、Sourcetreeからコミット・プッシュを実行しておきましょう。
手順6
| (1) | Sourcetreeを起動し、サイドメニューから「ファイルステータス」画面を開き、「全てインデックスに追加」ボタンをクリックしてステージングしてください。 |
| (2) | コミットメッセージは各手順のタイトル(ログイン画面の作成など)とし、コミット・プッシュを実行してください。 |
今後、各機能を追加するごとにコミット・プッシュをおこないソースを管理します。その際は上記の手順を参考にしてください。

