基本構成

目次
  • 解説
  • 1. 準備
  • 2. ファイルの作成
  • 3. ソースを確認してみよう
進捗を変更する


解説

1. 準備


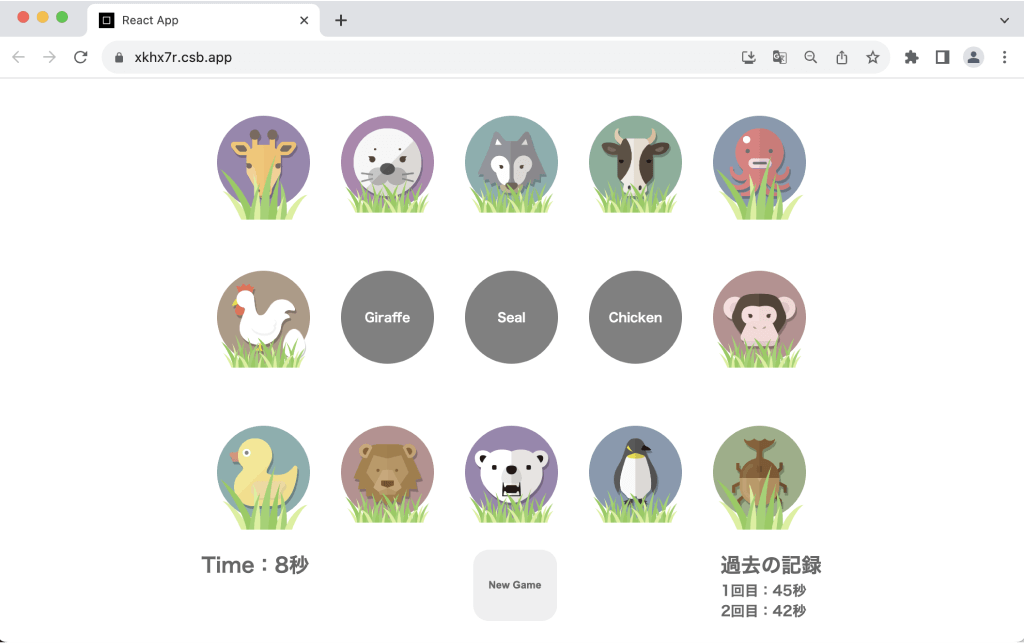
このコースでは、動物の英語名がランダムに出題されるので、表示された動物の画像の中から正しい物を「ドラッグ&ドロップ」で回答する「アニマルクイズ」アプリを作成します。アプリを作成しながら、コンポーネント設計や、useStateの注意点、useEffectクリーンアップ関数の使い方を学習しましょう。

完成図

2. ファイルの作成


まず、「アニマルクイズ」アプリの本体となる「AnimalQuiz」コンポーネントを作成しましょう。

手順1

(1)CodeSandboxの「Dashboard」から、「ReactApp」プロジェクトを開いてください。
(2)画面左側の「Exploler」を開き、「src」フォルダー内に「animalQuiz」フォルダーを作成してください。
(3)作成した「animalQuiz」フォルダー内に「AnimalQuiz.tsx」「animal.ts」ファイルを作成してください。

次に「index.tsx」で読み込むコンポーネントを「App」から「AnimalQuiz」に変更し、学習用に途中まで出来上がっているアニマルアプリを表示しましょう。

手順2

(1)AnimalQuiz.tsx」ファイルを、を下記のコードで置き換えてください。
AnimalQuiz.tsxのソースを表示
import { useEffect, useState } from 'react';
import styled from 'styled-components';
import { originalAnimals, AnimalType } from './animal';

const dragStart = (event: React.DragEvent<HTMLImageElement>) => {
  event.dataTransfer.setData(
    'text',
    event.currentTarget.getAttribute('data-image-name') || ''
  );
};

const dragEnter = (event: React.DragEvent<HTMLSpanElement>) => {
  if (
    event.currentTarget.classList &&
    event.currentTarget.classList.contains('droppable') &&
    !event.currentTarget.classList.contains('dropped')
  ) {
    event.currentTarget.classList.add('droppable-hover');
  }
};

const dragOver = (event: React.DragEvent<HTMLSpanElement>) => {
  if (
    event.currentTarget.classList &&
    event.currentTarget.classList.contains('droppable') &&
    !event.currentTarget.classList.contains('dropped')
  ) {
    event.preventDefault();
  }
};

const dragLeave = (event: React.DragEvent<HTMLSpanElement>) => {
  if (
    event.currentTarget.classList &&
    event.currentTarget.classList.contains('droppable') &&
    !event.currentTarget.classList.contains('dropped')
  ) {
    event.currentTarget.classList.remove('droppable-hover');
  }
};

export const AnimalQuiz = () => {
  const [questionAnimals, setQuestionAnimals] = useState<AnimalType[]>([]);
  const [correctAnimals, setCorrectAnimals] = useState<AnimalType[]>([]);

  useEffect(() => {
    newGame();
  }, []);

  // ドロップ時の処理
  const drop = (e: React.DragEvent<HTMLSpanElement>) => {
    e.preventDefault();
    const answerAnimal = e.dataTransfer.getData('text');
    const correctAnimal = e.currentTarget.getAttribute('data-animal-name');
    const isCorrect = answerAnimal === correctAnimal;
    // 正解の場合
    if (isCorrect) {
      // 正解した画像は半透明
      const index = questionAnimals.findIndex((v) => v.name === correctAnimal);
      questionAnimals[index].isCorrect = true;
      setQuestionAnimals(questionAnimals);
      // 正解した問題は次の問題に切り替え
      setCorrectAnimals(
        generateRandomCorrect(
          questionAnimals
            // すでに正解したものは除外
            .filter((a) => !a.isCorrect)
            // 表示されているものは除外
            .filter(
              (a) =>
                correctAnimals.filter((b) => a.name === b.name).length === 0
            ),
          correctAnimal
        )
      );
    }
  };

  // ニューゲーム
  const newGame = () => {
    const newQuestionAnimals = generateRandomQuestion(originalAnimals, 5);
    setQuestionAnimals(newQuestionAnimals);
    setCorrectAnimals(generateRandomQuestion(newQuestionAnimals, 3));
  };

  // ランダムな問題を生成
  const generateRandomQuestion = (animals: AnimalType[], count: number) => {
    const randomAnimals: AnimalType[] = [];
    const cloneAnimals: AnimalType[] = animals.map((v) => {
      return { ...v };
    });
    [...Array(count)].forEach(() => {
      const randomIndex = Math.floor(Math.random() * cloneAnimals.length);
      randomAnimals.push(cloneAnimals[randomIndex]);
      cloneAnimals.splice(randomIndex, 1);
    });
    return randomAnimals;
  };

  // ランダムな解答を生成
  const generateRandomCorrect = (
    animals: AnimalType[],
    correctAnimal: string
  ) => {
    const cloneCorrectAnimals = [...correctAnimals];
    const index = cloneCorrectAnimals.findIndex(
      (v) => v.name === correctAnimal
    );
    const randomIndex = Math.floor(Math.random() * animals.length);
    if (animals.length === 0) {
      cloneCorrectAnimals.splice(index, 1);
    } else {
      cloneCorrectAnimals[index] = animals[randomIndex];
    }
    return cloneCorrectAnimals;
  };

  return (
    <StyledApp>
      <div className="questionContainer">
        {questionAnimals.map((animal, i) => (
            <div key={animal.name}>
              <img
                className={`draggable ${animal.isCorrect && 'dragged'}`}
                draggable
                src={`/img/animalQuiz/${animal.name}.png`}
                data-image-name={animal.name}
                key={animal.name}
                onDragStart={(e) => dragStart(e)}
              />
            </div>
        ))}
      </div>
      <div className="correctContainer">
        {correctAnimals.map((animal, i) => (
          <div key={animal.name}>
            <span
              className="droppable"
              onDrop={(e) => drop(e)}
              onDragOver={(e) => dragOver(e)}
              onDragEnter={(e) => dragEnter(e)}
              onDragLeave={(e) => dragLeave(e)}
              data-animal-name={animal.name}
            >
              {animal.label}
            </span>
          </div>
        ))}
      </div>
      <div className="otherContainer">
        <button onClick={() => newGame()}>New Game</button>
      </div>
    </StyledApp>
  );
};

const StyledApp = styled.div`
  max-width: 800px;
  margin: 0 auto;


  div.questionContainer {
    width: 100%;
    display: flex;
    flex-direction: row;
    justify-content: center;
    flex-wrap: wrap;
  }

  div.correctContainer {
    display: flex;
    flex-direction: row;
    justify-content: center;
    height: 200px;
    align-items: center;

    span.droppable {
      width: 120px;
      height: 120px;
      font-size: 16px;
      font-weight: bold;
      text-align: center;
      color: white;
      line-height: 120px;
      background-color: gray;
      border-radius: 100px;
      transition: 0.2s;
      animation: change-color-anim 0.2s linear;
      user-select: none;
      display: inline-block;
    }

    @keyframes change-color-anim {
      0%,
      100% {
        background-color: gray;
      }
      50% {
        background-color: white;
      }
    }
  }

  div.otherContainer {
    width: 100%;
    margin: 0 auto;
    display: flex;
    justify-content: center;
    align-items: center;

    button {
      padding: 20px;
      border-radius: 20px;
      font-weight: bold;
      border: none;
      color: #666666;

      &:hover {
        opacity: 0.5;
      }
    }
  }

  img {
    width: 120px;
    height: 120px;
  }

  img.draggable {
    display: flex;
    justify-content: center;
    align-items: center;
    background-color: transparent;
    cursor: pointer;

    &:hover {
      opacity: 0.5;
    }
  }

  img.dragged {
    user-select: none;
    cursor: default;
    opacity: 0.2;

    &:hover {
      opacity: 0.2;
    }
  }
`;
(2)animal.ts」ファイルを、を下記のコードで置き換えてください。
animal.tsのソースを表示
export type AnimalType = {
  name: string;
  label: string;
  isCorrect: boolean;
};

export const originalAnimals: AnimalType[] = [
  {
    name: "bear",
    label: "Bear",
    isCorrect: false
  },
  {
    name: "beetle",
    label: "Beetle",
    isCorrect: false
  },
  {
    name: "buffalo",
    label: "Buffalo",
    isCorrect: false
  },
  {
    name: "cat",
    label: "Cat",
    isCorrect: false
  },
  {
    name: "chicken",
    label: "Chicken",
    isCorrect: false
  },
  {
    name: "cow",
    label: "Cow",
    isCorrect: false
  },
  {
    name: "deer",
    label: "Deer",
    isCorrect: false
  },
  {
    name: "dog",
    label: "Dog",
    isCorrect: false
  },
  {
    name: "duck",
    label: "Duck",
    isCorrect: false
  },
  {
    name: "eagle",
    label: "Eagle",
    isCorrect: false
  },
  {
    name: "elephant",
    label: "Elephant",
    isCorrect: false
  },
  {
    name: "fox",
    label: "Fox",
    isCorrect: false
  },
  {
    name: "giraffe",
    label: "Giraffe",
    isCorrect: false
  },
  {
    name: "goldfish",
    label: "GoldFish",
    isCorrect: false
  },
  {
    name: "hippo",
    label: "Hippo",
    isCorrect: false
  },
  {
    name: "horse",
    label: "Horse",
    isCorrect: false
  },
  {
    name: "koala",
    label: "Koala",
    isCorrect: false
  },
  {
    name: "ladybug",
    label: "LadyBug",
    isCorrect: false
  },
  {
    name: "lion",
    label: "Lion",
    isCorrect: false
  },
  {
    name: "monkey",
    label: "Monkey",
    isCorrect: false
  },
  {
    name: "octopus",
    label: "Octopus",
    isCorrect: false
  },
  {
    name: "panda",
    label: "Panda",
    isCorrect: false
  },
  {
    name: "penguin",
    label: "Penguin",
    isCorrect: false
  },
  {
    name: "pig",
    label: "Pig",
    isCorrect: false
  },
  {
    name: "polarbear",
    label: "PolarBear",
    isCorrect: false
  },
  {
    name: "raccoon",
    label: "Raccoon",
    isCorrect: false
  },
  {
    name: "seal",
    label: "Seal",
    isCorrect: false
  },
  {
    name: "sheep",
    label: "Sheep",
    isCorrect: false
  },
  {
    name: "squid",
    label: "Squid",
    isCorrect: false
  },
  {
    name: "wolf",
    label: "Wolf",
    isCorrect: false
  }
];
(3)index.tsx」ファイルを、下記のコードを参考に修正してください。
※「App」以外のコンポーネントがある場合は、「React.StrictMode」タグの中身が「AnimalQuiz」コンポーネントだけになるようにコメントアウトしてください。
import React from 'react';
import ReactDOM from 'react-dom/client';
// import { App } from "./App";
import { AnimalQuiz } from './animalQuiz/AnimalQuiz';

const rootElement = document.getElementById('root')!;
const root = ReactDOM.createRoot(rootElement);

root.render(
  <React.StrictMode>
    {/* <App /> */}
    <AnimalQuiz />
  </React.StrictMode>
);

index.tsx」ファイルで「AnimalQuiz」コンポーネントを読み込み、以下の画像のように画面右側の「Preview」にタイトルを表示することができました。ここまでの手順で、学習の準備が整いました。他のアプリを作成するときにも同様の手順を行うので覚えておきましょう。

※表示されない場合は「Preview」をリロードしてください。
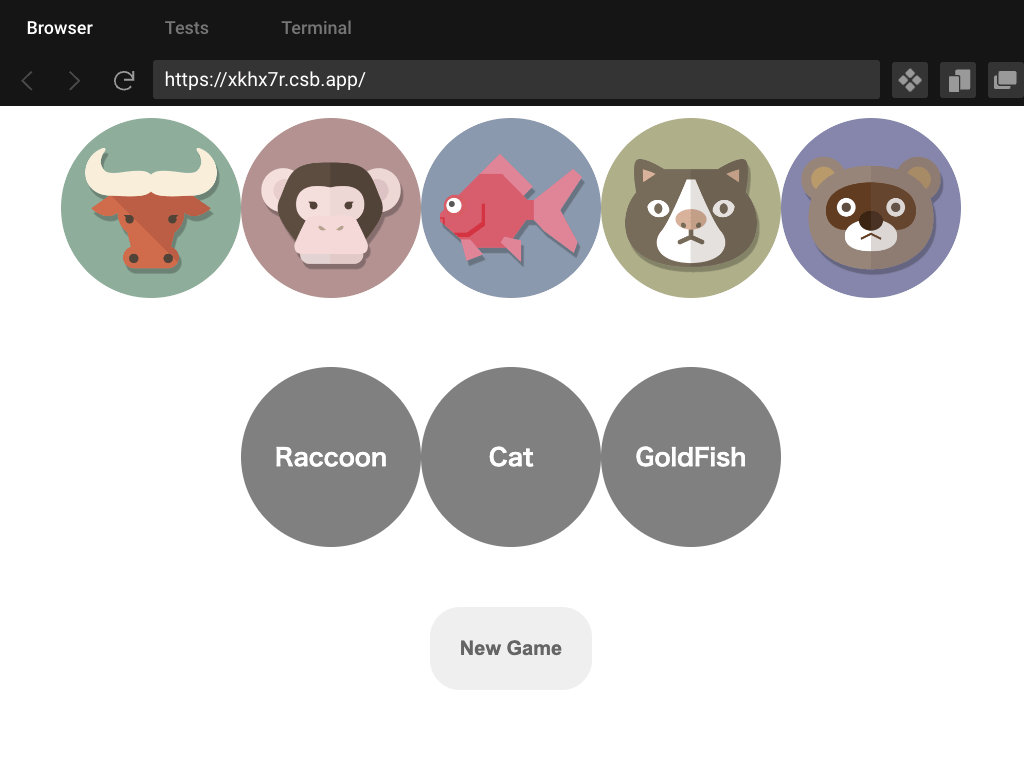
「アニマルクイズ」アプリの雛形が完成しました。どのような挙動をするか、動物の画像をドラッグ&ドロップして確かめてみましょう。

Tips
別タブで表示

この「アニマルクイズ」アプリは表示領域が「横800px」がある想定で作成しているので、コードを書く画面が狭くなってしまい、開発しにくい場合は「Preview」内右上の「Open In New Window」から、結果画面を別タブで開いて確認するようにしてください。

3. ソースを確認してみよう


AnimalQuiz」コンポーネントのソースをポイントを絞って見ていきましょう。

import

import { useEffect, useState } from 'react';
import styled from 'styled-components';
import { originalAnimals, AnimalType } from './animal';

ファイルの先頭では、ファイル内で使用する必要なライブラリ・ファイルをインポートしています。また、アプリで使用する画像は「public > img > animalQuiz」フォルダーに用意してあります。

ドラッグ&ドロップ用関数

const dragStart = (event: React.DragEvent<HTMLImageElement>) => {
  event.dataTransfer.setData(
    'text',
    event.currentTarget.getAttribute('data-image-name') || ''
  );
};

const dragEnter = (event: React.DragEvent<HTMLSpanElement>) => {
  if (
    event.currentTarget.classList &&
    event.currentTarget.classList.contains('droppable') &&
    !event.currentTarget.classList.contains('dropped')
  ) {
    event.currentTarget.classList.add('droppable-hover');
  }
};

const dragOver = (event: React.DragEvent<HTMLSpanElement>) => {
  if (
    event.currentTarget.classList &&
    event.currentTarget.classList.contains('droppable') &&
    !event.currentTarget.classList.contains('dropped')
  ) {
    event.preventDefault();
  }
};

const dragLeave = (event: React.DragEvent<HTMLSpanElement>) => {
  if (
    event.currentTarget.classList &&
    event.currentTarget.classList.contains('droppable') &&
    !event.currentTarget.classList.contains('dropped')
  ) {
    event.currentTarget.classList.remove('droppable-hover');
  }
};

ドラッグ&ドロップ処理用のヘルパー関数です。Reactへの関連性は薄い処理内容なので、理解しなくてもOKです。

useState

const [questionAnimals, setQuestionAnimals] = useState<AnimalType[]>([]);
const [correctAnimals, setCorrectAnimals] = useState<AnimalType[]>([]);

画像表示用のAnimalType型の配列と、回答用のAnimalType型の配列をstateで管理します。useStateを使用して状態変数と、更新関数を定義しており、新しい値で更新することで次の問題をレンダリングさせています。
※useStateは「カラークイズ」の章でも詳しく解説しています。

関数

// ドロップ時の処理
const drop = (e: React.DragEvent<HTMLSpanElement>) => {
  e.preventDefault();
  const answerAnimal = e.dataTransfer.getData('text');
  const correctAnimal = e.currentTarget.getAttribute('data-animal-name');
  const isCorrect = answerAnimal === correctAnimal;
  // 正解の場合
  if (isCorrect) {
    // 正解した画像は半透明
    const index = questionAnimals.findIndex((v) => v.name === correctAnimal);
    questionAnimals[index].isCorrect = true;
    setQuestionAnimals(questionAnimals);
    // 正解した問題は次の問題に切り替え
    setCorrectAnimals(
      generateRandomCorrect(
        questionAnimals
          // すでに正解したものは除外
          .filter((a) => !a.isCorrect)
          // 表示されているものは除外
          .filter(
            (a) =>
              correctAnimals.filter((b) => a.name === b.name).length === 0
          ),
        correctAnimal
      )
    );
  }
};

// ニューゲーム
const newGame = () => {
  const newQuestionAnimals = generateRandomQuestion(originalAnimals, 5);
  setQuestionAnimals(newQuestionAnimals);
  setCorrectAnimals(generateRandomQuestion(newQuestionAnimals, 3));
};

// ランダムな問題を生成
const generateRandomQuestion = (animals: AnimalType[], count: number) => {
  const randomAnimals: AnimalType[] = [];
  const cloneAnimals: AnimalType[] = animals.map((v) => {
    return { ...v };
  });
  [...Array(count)].forEach(() => {
    const randomIndex = Math.floor(Math.random() * cloneAnimals.length);
    randomAnimals.push(cloneAnimals[randomIndex]);
    cloneAnimals.splice(randomIndex, 1);
  });
  return randomAnimals;
};

// ランダムな解答を生成
const generateRandomCorrect = (
  animals: AnimalType[],
  correctAnimal: string
) => {
  const cloneCorrectAnimals = [...correctAnimals];
  const index = cloneCorrectAnimals.findIndex(
    (v) => v.name === correctAnimal
  );
  const randomIndex = Math.floor(Math.random() * animals.length);
  if (animals.length === 0) {
    cloneCorrectAnimals.splice(index, 1);
  } else {
    cloneCorrectAnimals[index] = animals[randomIndex];
  }
  return cloneCorrectAnimals;
};

それぞれの関数はコメントに記載している処理を行います。

useEffect

useEffect(() => {
  newGame();
}, []);

依存配列には空の配列を指定しているので、コンポーネントのマウント(画面表示)時にのみnewGame関数を実行して、クイズの準備をします。
※useEffectは「カラークイズ」の章でも詳しく解説しています。

DOM要素

return (
  <StyledApp>
    <div className="questionContainer">
      {questionAnimals.map((animal, i) => (
          <div key={animal.name}>
            <img
              className={`draggable ${animal.isCorrect && 'dragged'}`}
              draggable
              src={`/img/animalQuiz/${animal.name}.png`}
              data-image-name={animal.name}
              key={animal.name}
              onDragStart={(e) => dragStart(e)}
            />
          </div>
      ))}
    </div>
    <div className="correctContainer">
      {correctAnimals.map((animal, i) => (
        <div key={animal.name}>
          <span
            className="droppable"
            onDrop={(e) => drop(e)}
            onDragOver={(e) => dragOver(e)}
            onDragEnter={(e) => dragEnter(e)}
            onDragLeave={(e) => dragLeave(e)}
            data-animal-name={animal.name}
          >
            {animal.label}
          </span>
        </div>
      ))}
    </div>
    <div className="otherContainer">
      <button onClick={() => newGame()}>New Game</button>
    </div>
  </StyledApp>
);

実際に画面に表示されるJSXです。

スタイル

const StyledApp = styled.div`

  div.questionContainer {
    width: 100%;
    display: flex;
    flex-direction: row;
    justify-content: center;
    flex-wrap: wrap;
  }

  div.correctContainer {
    display: flex;
    flex-direction: row;
    justify-content: center;
    height: 200px;
    align-items: center;

    span.droppable {
      width: 120px;
      height: 120px;
      font-size: 16px;
      font-weight: bold;
      text-align: center;
      color: white;
      line-height: 120px;
      background-color: gray;
      border-radius: 100px;
      transition: 0.2s;
      animation: change-color-anim 0.2s linear;
      user-select: none;
      display: inline-block;
    }

    @keyframes change-color-anim {
      0%,
      100% {
        background-color: gray;
      }
      50% {
        background-color: white;
      }
    }
  }

  div.otherContainer {
    width: 100%;
    margin: 0 auto;
    display: flex;
    justify-content: center;
    align-items: center;

    button {
      padding: 20px;
      border-radius: 20px;
      font-weight: bold;
      border: none;
      color: #666666;

      &:hover {
        opacity: 0.5;
      }
    }
  }

  img {
    width: 120px;
    height: 120px;
  }

  img.draggable {
    display: flex;
    justify-content: center;
    align-items: center;
    background-color: transparent;
    cursor: pointer;

    &:hover {
      opacity: 0.5;
    }
  }

  img.dragged {
    user-select: none;
    cursor: default;
    opacity: 0.2;

    &:hover {
      opacity: 0.2;
    }
  }
`;

styled-componentsを使用して指定されたスタイルです。